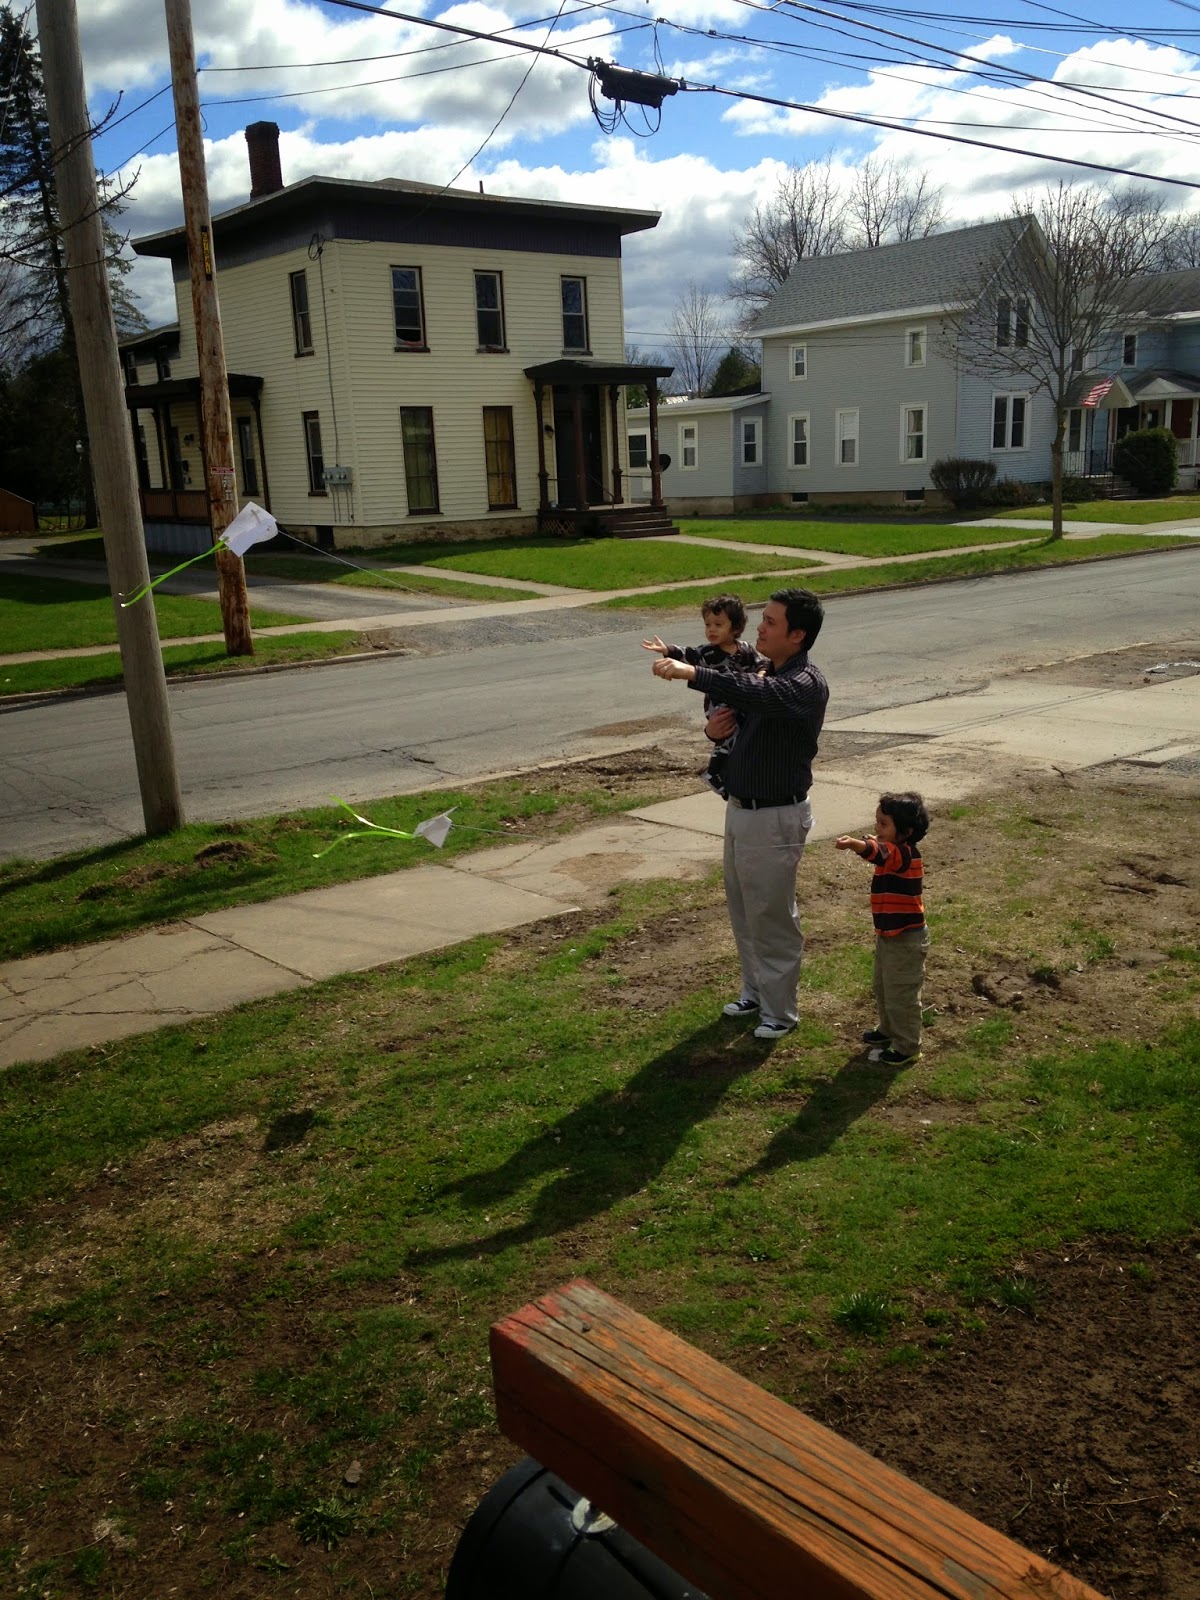
Last year at a church picnic, someone brought kites and Caden loved flying them. Ever since the weather has warmed, he has been asking to go kite flying. Originally I planned on buying him one, until I came across a tutorial on Inner Child Fun on how to make an easy kite. We followed the steps together one by one in their video.
The best part about making this easy kite is it's adaptable to what you have on hand. We used Popsicle sticks instead of skewers, gift wrapping ribbon instead of streamers, and baker's twine instead of string. I also let the boys add stickers and washi tape for decoration.
The day we made the kites was snowy, so on Sunday we decided to try them out because it was windy and we had been cooped up all weekend due to cold weather and sickness. The boys had a blast! The wind wasn't consistent so the kites didn't stay up very long, but it was an excellent lesson in patience and perseverance.
Then Daddy came home and helped.
Making easy kites out of household objects was the perfect activity for practicing different skills, spending time outdoors, and having fun as a family!
Showing posts with label How-tos. Show all posts
Tuesday, April 28, 2015
Friday, October 21, 2011
Cheap & Easy Penguin Costume
One Halloween night in high school I was going to a party but had no idea what to wear. I didn't want to wear a costume I had worn before. I browsed through my dismal closet and saw my old tuxedo shirt from middle-school band. An idea hit me: I could make a penguin costume! Here is what I did:
- Wear a tuxedo or white button-up shirt, a bowtie, black pants, black shoes, and a black sweater or blazer.
- Paint your forehead and nose black. Paint the rest of your face white.
- Cut out penguin feet from yellow construction paper and tape them to the top of your shoes.
- Use the cardboard tube from a roll of toilet paper to make the beak. Glue yellow construction paper to the tube.
- Flatten in and cut out a triangle, starting at an open end. Cut through both sides but not all the way to the other open end so that it stays intact.
- Keep the beak in place with string or elastic.
- To be Tacky the Penguin, wear sunglasses and a Hawaiian shirt.
Thursday, October 20, 2011
How to Make an Angelina Ballerina Costume
![]() |
| abt.org |
Angelina Ballerina, or Angelina Mouseling, is a mouse who loves to dance ballet. Created by author Katharine Holabird and illustrator Helen Craig, Angelina Ballerina was first a book series and is now a TV series. And Angelina Ballerina can be a cute, easy costume for your little girl.
- Angelina Ballerina is a white mouse, so dress your daughter in a white long-sleeved shirt, white tights, and white gloves.
- For ears, buy a thin, neutral-colored headband and pink and white paper at the dollar store. Cut out large white ears and smaller pink ears. Glue the pink ears on the white ears to make the inner ear. Glue the ears to the headband.
- Make Angelina’s tail by inflating a long, white balloon (the kind used to make balloon animals) and tying it around your daughter's waist with string. Another option is to pin a stuffed, white tube sock to the costume.
- With makeup draw three white whiskers on each cheek and a pink nose.
- Finish the costume with a pink leotard, pink tutu, and pink ballet slippers. (Check thrift stores and online to save money on the ballet accessories.) Tie a pink bow in her hair, or tie or glue it to the headband. Sometimes Angelina Ballerina has a red rose pinned to her right above her tutu.
Now your little girl is ready to dance and twirl like Angelina Ballerina!
Monday, October 17, 2011
Cheap & Easy Mouse Costume
First, choose what color mouse you would like to be: white, black, brown, or gray. Wear clothes in that one color. For paws, wear white or pink gloves and shoes. With makeup draw three long whiskers and a pink nose.
To make ears, buy a thin, neutral-colored headband and a pad of colored construction paper at the dollar store. Cut out large ears in your chosen color. Cut out smaller ears in the color of your gloves and glue them on the larger ears to make the inside part of the ear. Tape the ears to the headband.
For the tail, inflate a long balloon (the kind used to make balloon animals) in the same color as your clothes or gloves and tie it around your waist with string. Another option is to pin a stuffed colored tube sock to your pants.
Choose accessories: cheeseheads or fake cheese, a mouse stuffed animal, or a mousetrap. Put on sunglasses and use a cane to be one of the three blind mice.
- Remy is a gray rat with pink hands and feet, so wear all gray clothes and pink gloves and shoes. You can buy cheap gray sweats at Wal-mart.
- Make a pink tail and ears. With makeup draw three white whiskers on each cheek and a pink nose.
- To make the Remy costume complete, wear a chef hat and carry a wooden spoon. (If you wear a hat, then be sure to tape the ears to the sides of the headband instead of to the top. Or tape the ears to the hat.)
- A cute costume idea for couples would be for one to dress up as Remy and the other to dress up as Linguini (the young chef Remy helps) or Gusteau (the fat chef that inspires Remy to cook).
Friday, April 8, 2011
How to Number Your Comments in Blogger
My friend Ashley led me to this great tutorial on how to number your comments in blogger. The directions were really easy to follow. I needed to do this because I hated counting comments for giveaways!
Wednesday, November 24, 2010
Make Your Own Blog Button
I always wanted a blog button, but I'm not html savvy. I looked it up on eHow and found this amazing article: How to Add a Blog Button with Text Box Underneath for Code. The directions are very clear and easy to follow. Just one comment on step 2: you can upload your photo to Google's Picasa Web Albums. Once uploaded, click on the photo and on the right click on "Link to this photo." Select the thumbnail size and check the box next to "Image Only (no link)." Then copy the html code under "Embed Image" (not under "Link"). I love my new button!
Subscribe to:
Posts (Atom)